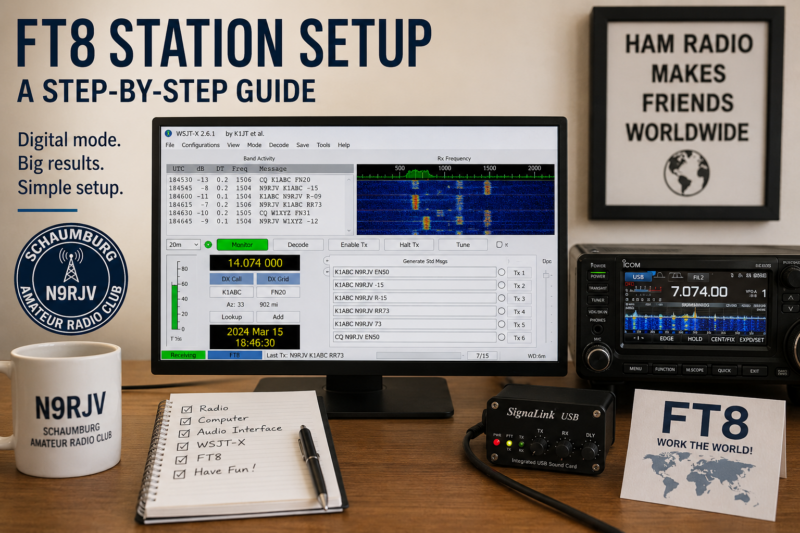
FT8 Step-by-Step Guide
Make FT8 Station First Contact
Here is a practical operating idea for Schaumburg Amateur Radio Club (SARC) members: set up FT8 one step at a time and learn how your radio, computer, audio path, clock, antenna, and logging software work together.
This guide grew from a post idea by Paul Meyers, KE9EJX. It is written for members, visitors, new hams, returning operators, and experienced operators who would like a dependable setup checklist. You can begin by receiving only. When the station is working correctly, move on to a careful, low-power transmit test and a first contact.
Topic Snapshot
| Item | Details |
|---|---|
| Subject | FT8 Station Setup: A Step-by-Step Guide |
| Post Writer | Paul Meyers, KE9EJX |
| Audience | SARC members, visitors, new hams, returning operators, and active operators |
| Main Goal | Install WSJT-X, connect the radio and computer, decode signals, test a clean transmit path, and log a first FT8 QSO |
| Main Software | WSJT-X |
| Basic Signal Path | Antenna → transceiver → USB or external interface → computer |
| Best First Step | Receive and decode before transmitting |
| Call to Action | FT8 Setup |
What FT8 Is
FT8 is a digital amateur radio mode developed for reliable contacts when signals are weak. Its name refers to the Franke-Taylor design and eight-frequency-shift keying, or 8-FSK. It uses short, structured messages and alternating 15-second transmit-and-receive periods. A normal exchange carries call signs, a grid locator, signal reports, acknowledgements, and a closing. It is designed for making a contact, or QSO, rather than for an open-ended keyboard conversation.1 3
That makes FT8 a useful learning mode. It gives immediate feedback about propagation, antenna performance, receive noise, computer timing, audio levels, and radio control. It also gives newer operators a structured way to become comfortable with high-frequency (HF) and digital operation.
A Few Terms Before You Start
| Term | Plain-Language Meaning |
|---|---|
| QSO | A completed radio contact. |
| CQ | A general call inviting another station to answer. |
| Grid locator | A short code that identifies a geographic area. WSJT-X uses your grid as part of many FT8 exchanges. |
| CAT | Computer control of the transceiver. It lets WSJT-X read or change frequency and mode. |
| PTT | Push-to-talk control. In an FT8 station, software usually keys the transmitter. |
| ALC | Automatic level control. The radio’s ALC indication helps you avoid excessive transmit audio, but the correct target is model-specific. |
| UTC | Coordinated Universal Time, the common time reference used in amateur radio logs. |
| USB | It can mean a Universal Serial Bus cable or upper sideband radio mode. The surrounding words tell you which meaning applies. |
What You Need
- An amateur radio transceiver that covers a band where you have operating privileges.
- A suitable antenna, feed line, and station grounding or bonding appropriate to your installation.
- A computer supported by the current WSJT-X release.
- WSJT-X from the official project site.
- A data-capable USB cable, or an external audio and radio-control interface for radios that do not provide both functions internally.
- The correct radio driver, if your manufacturer requires one.
- Accurate computer time.
- A logbook program or the built-in WSJT-X logging prompt.
Some modern transceivers carry both radio control and transmit/receive audio over one USB cable. Other radios need a separate sound-card interface, serial control cable, or PTT connection. Do not copy menu settings from a different radio model. Use the exact manual and support page for your transceiver.
Before transmitting, confirm that the frequency and emission are permitted for your license class. Band privileges and recommended operating plans can change, so check the current ARRL band chart and official regulatory information rather than relying on an old printed list.4
Station Signal Path
---
config:
  theme: base
  themeVariables:
    primaryTextColor: "#000000"
    secondaryTextColor: "#000000"
    tertiaryTextColor: "#000000"
    lineColor: "#000000"
  markdownAutoWrap: true
  flowchart:
    wrappingWidth: 220
    useMaxWidth: true
    nodeSpacing: 40
    rankSpacing: 50
---
flowchart TD
    A["`Antenna`"]

    B["`Transceiver`"]

    C["`USB cable or
external interface`"]

    D["`Computer running
WSJT-X`"]

    E["`Station
log`"]

    F["`PSK Reporter
(optional)`"]

    A --> B

    B -->|"Receive audio"| C
    C --> D

    D -->|"Transmit audio"| C
    D -->|"CAT and PTT control"| C

    C --> B

    D --> E
    D --> F
If WSJT-X can control the radio but cannot decode, the control path may be working while the receive-audio path is not. If the waterfall looks normal but the radio will not transmit, the audio path may be working while PTT or CAT control is not. Troubleshooting one path at a time is much easier than changing every setting at once.
FT8 Setup: Step by Step
1. Start With the Official Instructions
Use the WSJT-X 3.0.0 User Guide supplied with this article as a detailed setup reference.1 Then check the current official WSJT-X downloads page before installing. At the time this article was checked, the official project listed WSJT-X 3.0.2 as the latest general-availability release. Software versions can change, so use the current official download and the matching user guide.2
2. Read the Manual for Your Exact Radio
Find the manufacturer’s FT8, data-mode, USB-audio, and CAT instructions for your model. Write down the required driver, baud rate, data mode, audio source, PTT method, and any recommended split setting. Menu numbers and names often differ even between radios from the same manufacturer.
3. Install Drivers in the Correct Order
Follow the manufacturer’s installation order exactly. Some radios require a virtual communications port, usually called a COM port, or USB-audio driver to be installed before the radio is connected. After installation, note the COM port or device names assigned by the computer.
4. Connect the Radio and Computer
Use a known data-capable cable. A cable that charges a device is not necessarily wired for data. If you use an external interface, connect receive audio, transmit audio, CAT, and PTT according to the interface and radio manuals.
Keep the first test simple. Disconnect unneeded software and accessories. One radio, one interface, one WSJT-X instance, and one logbook are easier to troubleshoot.
5. Synchronize the Computer Clock
FT8 stations transmit in timed 15-second periods. Enable automatic internet time synchronization in the operating system and confirm that the clock remains accurate after sleep, restart, travel, or a network interruption. Timing errors can prevent decoding or cause a QSO to stall even when the signal is strong.3
6. Prepare the Radio for Digital Audio
- Select the manufacturer-recommended data mode or FT8 preset.
- Select the correct rear-panel, USB, or accessory input for transmit audio.
- Use a receive passband wide enough to show the active FT8 signals in the waterfall.
- Turn off speech compression and voice processing unless the manufacturer specifically instructs otherwise for the selected data mode.
- Start with low transmit power and conservative audio drive.
Do not assume that “no ALC movement” is the correct rule for every radio. Manufacturers use different metering and level targets. Follow the instruction for your exact model, and avoid driving the audio input harder than necessary.
7. Enter Your Station Details in WSJT-X
Open File → Settings → General. Enter your call sign in My Call and your Maidenhead grid locator in My Grid. Review the remaining options, but keep the first setup simple.
8. Configure the Radio Tab
- Select the exact radio model.
- Select the COM port or network-control method assigned to the radio.
- Set the baud rate and handshake values required by the radio manual.
- Select the recommended PTT method, commonly CAT for a direct USB setup.
- Select the correct mode behavior, such as Data/Pkt (data or packet mode) or USB, as directed by the manufacturer.
- Select the recommended split method. Depending on the radio, that may be Rig, Fake It, or None.
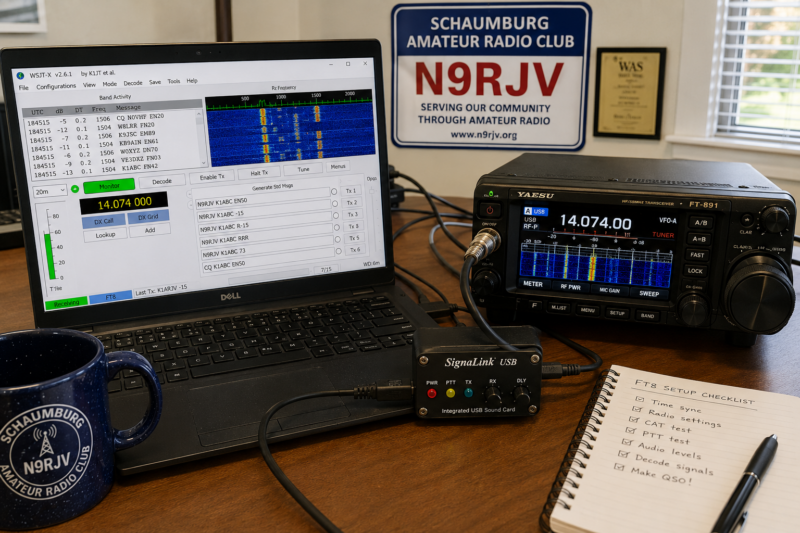
- Click Test CAT. A successful test should show that WSJT-X and the radio are communicating.
- Use Test PTT only after the antenna or dummy load, power level, and station safety checks are complete.
WSJT-X may briefly change the transceiver’s displayed frequency during transmit when split operation or Fake It is selected. That can be normal behavior, not a fault.1
9. Configure the Audio Tab
Open File → Settings → Audio. Select the radio or interface as the input device and output device. Do not select the laptop microphone or speakers unless that is intentionally how your interface works. The input is audio coming from the radio to WSJT-X. The output is audio going from WSJT-X to the radio.1
10. Receive Before You Transmit
Select FT8 in WSJT-X and choose an authorized band from the band selector. Let the program receive for several cycles.
A working receive setup should show activity in the waterfall when the band is active and decoded messages in the Band Activity window. Adjust receive audio so the level is useful but not pinned at an extreme. If nothing decodes, check time, mode, filter width, audio-device selection, and receive level before changing CAT or transmit settings.
11. Test the Transmit Path at Low Power
Use a suitable dummy load when available, or a properly connected antenna that is safe for the selected band. Set low radio-frequency (RF) power. Use the WSJT-X Tune function and raise the computer’s transmit-audio level only enough to produce the intended RF output. Watch the radio’s ALC, power, current, temperature, and standing wave ratio (SWR) indications.
FT8 places a steady load on the transmitter during each transmit period. Check the radio, amplifier, tuner, power supply, and antenna system duty-cycle limits. Stop if anything becomes unusually hot, unstable, or noisy. Clean audio and modest power are better than an overdriven signal.
12. Make and Log a First QSO
To answer a station, double-click a decoded CQ and review the generated messages before enabling transmit. To call CQ, choose a clear audio frequency in the waterfall, select the correct transmit period, and enable transmit. WSJT-X can sequence the normal exchange, but remain at the station and supervise it.
When the contact completes, review the call sign, band, mode, time, grid, and signal reports in the logging window. Save the QSO. Keeping one known-good log entry is a useful final setup check.
After a short supervised test, you can also use PSK Reporter to see where participating receiving stations reported your signal. Treat a reception report as a propagation and station check, not proof that a two-way QSO was completed.5
How It Works
One FT8 station transmits while the other receives. In the next 15-second period, they trade places. The software attempts to decode usable signals in the receiver passband and organizes the results by time and audio frequency.
| Stage | Information Exchanged | What It Means |
|---|---|---|
| CQ | Call sign and usually a grid locator | A station is looking for a contact. |
| Reply | Both call signs and usually a grid locator | A second station answers. |
| Reports | Numeric signal reports | Each station reports the decoded signal level. Negative numbers are normal in FT8. |
| Acknowledgement | RRR or RR73 | The report was received and the QSO is being confirmed. |
| Close | 73 | The exchange is complete and ready to log. |
---
config:
  theme: base
  themeVariables:
    primaryTextColor: "#000000"
    secondaryTextColor: "#000000"
    tertiaryTextColor: "#000000"
    lineColor: "#000000"
  markdownAutoWrap: true
  flowchart:
    wrappingWidth: 220
    useMaxWidth: true
    nodeSpacing: 40
    rankSpacing: 50
---
flowchart TD
    A["`Listen and
decode`"]

    B["`Choose a decoded CQ
or call CQ`"]

    C["`Exchange call signs
and grid information`"]

    D["`Exchange signal
reports`"]

    E["`Acknowledge with
RRR or RR73`"]

    F["`Close
with 73`"]

    G["`Review and log
the QSO`"]

    A --> B
    B --> C
    C --> D
    D --> E
    E --> F
    F --> G
Official Manufacturer FT8 Resources
Start with the page for your exact model. The links below are useful examples from major amateur radio manufacturers, but a setting shown for one radio should not be copied blindly to another. Check the current manual, firmware notes, driver page, and support information before changing menus.
| Manufacturer | Official FT8 or Data-Mode Resource | What to Look For |
|---|---|---|
| Icom | IC-7300 Product Page — One-Touch FT8 Mode Preset6 | FT8 preset availability, USB driver requirements, data-mode input, Icom CI-V computer control, CAT settings, and model-specific audio levels. |
| Yaesu | FTX-1 Series Operation Manual — Data (FT8/RTTY/PSK) Operation7 | Virtual COM-port driver, USB connection, FT8 preset, modulation source, filter settings, and CAT/PTT choices. |
| Kenwood | Amateur Radio Software Downloads — Model-Specific FT8 Setup Guides8 | FT8 setup PDFs for supported models, virtual COM-port drivers, WSJT-X radio settings, USB audio, and ALC guidance. |
| FlexRadio | SmartSDR — FT8 and WSJT-X Setup Resources9 | SmartSDR, Digital Audio Exchange (DAX) audio, CAT, transmit profiles, and WSJT-X setup material for FLEX radios. |
| Elecraft | K4 Built-In Operating Manual — Data Modes and FT8/JT Reference10 | DATA mode, USB or line audio, compression behavior, ALC, and the latest status of model-specific FT8 instructions. |
Common Problems and Quick Checks
| Symptom | Likely Area | First Checks |
|---|---|---|
| No waterfall and no decodes | Receive audio | Confirm the WSJT-X input device, radio USB/audio output, data mode, receive filter, and audio level. |
| Waterfall is active but nothing decodes | Time or mode | Check computer time, FT8 mode selection, dial frequency, and whether the signals are inside the displayed passband. |
| Test CAT fails | Radio control | Check the exact rig model, COM port, baud rate, handshake, driver, cable, and whether another program already controls the port. |
| Radio keys but produces no RF | Transmit audio source | Check WSJT-X output device, radio USB/data input selection, mute settings, data mode, and transmit-audio level. |
| RF output is high or unstable | Audio overdrive or station RF feedback | Lower the WSJT-X output level, review the radio’s ALC target, reduce power, improve cable routing, and add appropriate ferrite suppression if needed. |
| Radio frequency moves during transmit | Split or Fake It operation | Review the WSJT-X split setting and the manufacturer’s recommendation. The movement may be intentional. |
| Decodes are good but QSOs stall | Timing, sequencing, or propagation | Check the clock, transmit period, selected station, transmit frequency, and whether the other station is still calling. |
| Equipment becomes hot | Duty cycle or excessive power | Stop transmitting, reduce power, review cooling and duty-cycle limits, and verify the antenna system. |
---
config:
  theme: base
  themeVariables:
    primaryTextColor: "#000000"
    secondaryTextColor: "#000000"
    tertiaryTextColor: "#000000"
    lineColor: "#000000"
  markdownAutoWrap: true
  flowchart:
    wrappingWidth: 220
    useMaxWidth: true
    nodeSpacing: 40
    rankSpacing: 50
---
flowchart TD
    A{"`Can WSJT-X
decode signals?`"}

    B["`Check the radio mode, receive audio,
level, passband, and clock`"]

    C{"`Does Test CAT
succeed?`"}

    D["`Check the rig model, COM port,
baud rate, driver, and port conflicts`"]

    E{"`Does Test PTT
key the radio?`"}

    F["`Check the PTT method, control path,
and radio data settings`"]

    G{"`Is the low-power
transmit audio clean?`"}

    H["`Lower the audio drive and review
the model-specific ALC target`"]

    I["`Make and log a
supervised QSO`"]

    A -->|"No"| B
    A -->|"Yes"| C

    C -->|"No"| D
    C -->|"Yes"| E

    E -->|"No"| F
    E -->|"Yes"| G

    G -->|"No"| H
    G -->|"Yes"| I
What to Bring to an FT8 Setup Session
For a SARC help session or a home workbench session, gather the following items before you begin:
- The exact radio model and its current operating manual.
- The computer, charger, and operating-system login needed to install drivers or software.
- The correct USB cable or external digital interface.
- Any required interface cables, adapters, and ferrite cores.
- Your call sign and grid locator, if you will transmit.
- A list or screenshot of the radio’s current data, USB, CAT, and audio menu settings.
- A safe antenna connection or suitable dummy load for transmit testing.
- A notebook for recording the final working settings.
That last item matters. Once the station works, save screenshots and write down the radio menus, COM port, audio devices, baud rate, PTT method, split setting, receive level, and transmit level. A one-page station record can save a long troubleshooting session after a software update or computer change.
Suggested SARC Goals
| Member Type | Suggested Goal |
|---|---|
| Visitor or radio-curious guest | Watch an FT8 waterfall and learn what one decoded line means. |
| Newly licensed ham | Use the current band chart to identify legal operating choices, then complete a receive-only setup. |
| First-time digital operator | Decode activity, pass the CAT test, and make one supervised low-power QSO. |
| Returning operator | Reconnect an older transceiver through a dependable audio and control interface. |
| Experienced FT8 operator | Review another member’s setup for clean audio, sensible power, accurate time, and reliable logging. |
| Portable operator | Create a repeatable checklist for radio, computer, battery, clock, interface, and antenna setup. |
| Club mentor | Build a short model-specific setup note for a radio commonly used by SARC members. |
| Everyone | Learn one new thing about propagation, station integration, or digital operating practice. |
Give It a Try
Begin with receive-only operation. When the waterfall and decodes appear, you have already confirmed several important parts of the station: the antenna, receiver, audio path, software, and clock. Then test CAT. Test PTT carefully. Make a clean low-power transmission. Complete one QSO and log it.
FT8 is not a replacement for voice, Morse code (CW), building, public service, or the many other parts of amateur radio. It is another useful operating tool and a good way to understand how a modern station works. Bring your questions to SARC, compare notes with another operator, and use n9rjv.org to stay connected with the club.11
Some Common Radio Setup Guides by KE9EJX
References
- “WSJT-X User Guide, Version 3.0.0.” WSJT Development Group, SourceForge. Accessed July 18, 2026. Full URL: https://wsjt.sourceforge.io/wsjtx-doc/wsjtx-main-3.0.0.html ↩
- “Get WSJT-X.” WSJT Development Team, official WSJT-X project site. Accessed July 18, 2026. Full URL: https://wsjtx.github.io/wsjtx/downloads.html ↩
- “Release Notes 2.6.1 — Brief Description of the FT8 Protocol.” WSJT Development Group, SourceForge. Accessed July 18, 2026. Full URL: https://wsjt.sourceforge.io/wsjtx-doc/Release_Notes_2.6.1.txt ↩
- “Band Plan.” ARRL: The National Association for Amateur Radio. Accessed July 18, 2026. Full URL: https://www.arrl.org/band-plan ↩
- “Display Reception Reports.” PSK Reporter. Accessed July 18, 2026. Full URL: https://pskreporter.info/pskmap.html ↩
- “IC-7300 — One-Touch FT8 Mode Preset.” Icom Inc. Accessed July 18, 2026. Full URL: https://www.icomjapan.com/lineup/products/IC-7300_USA/ ↩
- “FTX-1 Series Operation Manual — Data (FT8/RTTY/PSK) Operation.” Yaesu Musen Co., Ltd. Accessed July 18, 2026. Full URL: https://www.yaesu.com/Files/4CB893D7-1018-01AF-FA97E9E9AD48B50C/FTX-1_OM_ENG_EH084M201_2506E-DS.pdf ↩
- “Amateur Radio Products Software Downloads.” JVCKENWOOD Corporation. Accessed July 18, 2026. Full URL: https://www.kenwood.com/i/products/info/amateur/software_download.html ↩
- “SmartSDR.” FlexRadio Systems. Accessed July 18, 2026. Full URL: https://www.flexradio.com/ssdr/ ↩
- “K4 Built-In Operating Manual — Data Modes and FT8/JT Reference.” Elecraft, Inc. Accessed July 18, 2026. Full URL: https://ftp.elecraft.com/K4/Manuals%20Downloads/K4%20Built-In%20Operating%20Manual%20rev%20D6/K4BuiltInOperatingManualrevD6.html ↩
- “Home.” Schaumburg Amateur Radio Club, N9RJV. Accessed July 18, 2026. Full URL: https://www.n9rjv.org/ ↩